Dan, wanted to share some updates on this review.
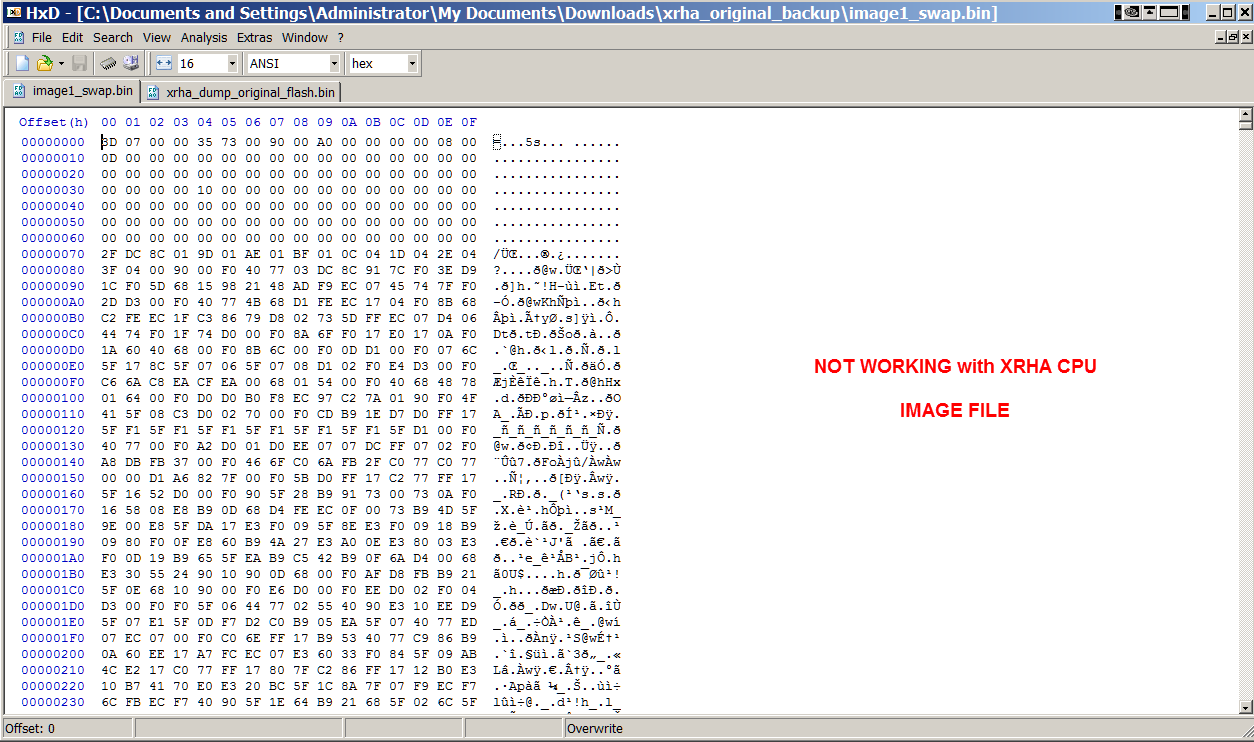
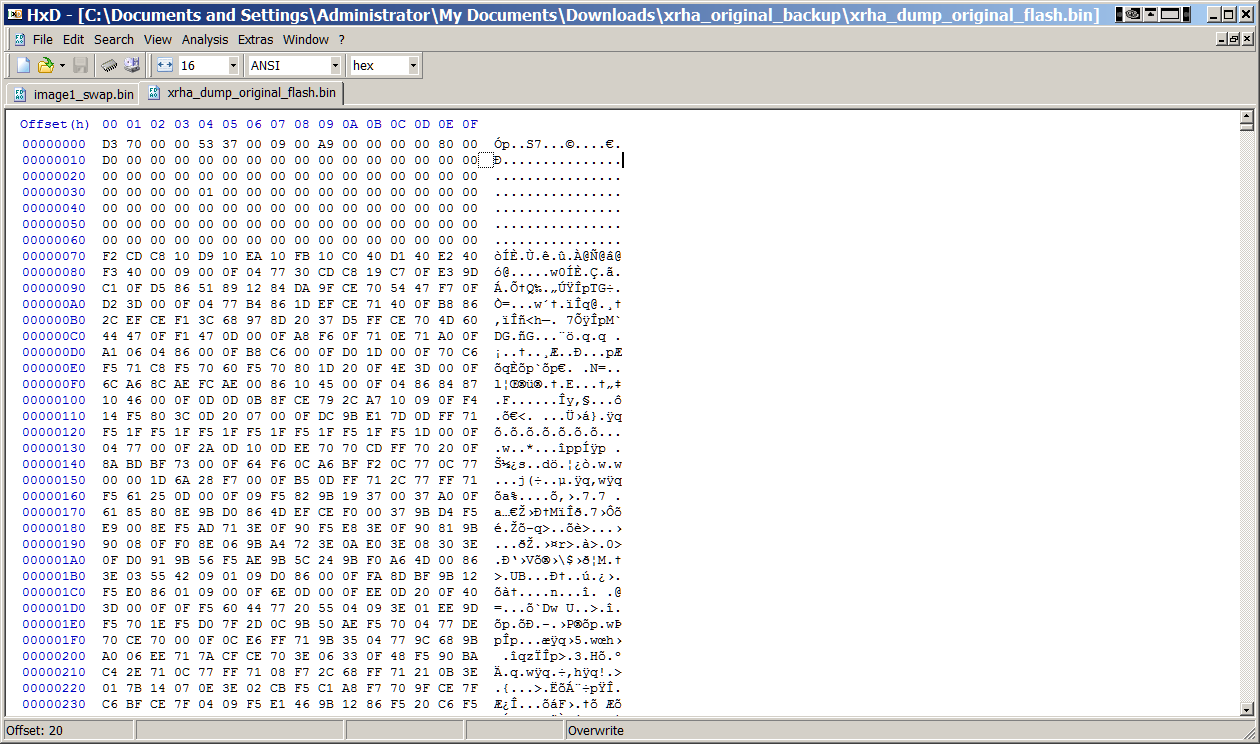
Your posted image appears to be reversed to what is stored inside the original flash memory present on the official XRHA demo board. See below to compare.
Invested all of Friday for this review and clearly see many improvements that can be made for production. For starters, took close to 8 minutes to completely read out the contents of the original XRHA flash memory device using the standard SPI command. Respectively the same to write the contents onto a blank flash device. This exercise was to R/W the entire density of the IS25LQ016B memory device - not to exclude any memory regions. On Monday we will confirm if the process was a success or not but feeling very confident that we have cloned the original flash device and enabled the QE bit. For this review, we did not use the XFLASH tool to enable the QE bit so still researching on how to properly use the QSPI support within this tool. The QE bit was enabled using our code. The use of the XFLASH tool can be improved with examples on how to use this fairly powerful tool. We did manage to create a custom definition for our QSPI flash device and did interface our definition with the xTimeComposer to flash our blinky code into this new memory IC.
We are moving to design a production grade, yet affordable programming jig using an XMOS processor for this purpose. Will share more details next week as we close the design.
Try to alter your flash image as noted above to match the format of the original flash device and post your revised status. If still not working, we can send out a copy of the flash (after testing against our original XMOS board) to your side. ETA is Monday for 'final' testing of the cloned image.
XHRA-2HPA No USB Activity Topic is solved
-
- XCore Legend
- Posts: 1913
- Joined: Thu Jun 10, 2010 11:43 am
-
- Junior Member
- Posts: 6
- Joined: Wed Aug 24, 2016 7:54 am
That is realy enlightening, i mean the two pictures. The first is exactly the hex code obtained if you run the x-Configurator utility. See here for step by step execution: https://www.xcore.com/forum/viewtopic.php?f=7&t=4815 in last post.
There is no need to invert the nibbles as is mentioned in other post!
Thanks a lot mon2 for your work!
There is no need to invert the nibbles as is mentioned in other post!
Thanks a lot mon2 for your work!
-
- XCore Legend
- Posts: 1913
- Joined: Thu Jun 10, 2010 11:43 am
This post is to confirm that the cloned QSPI flash (IS25LQ016B - sourced from Mouser) does indeed work just like the original. Applied the cloned QSPI flash device onto the official XMOS XRHA PCB and the circuit enumerated just fine on our Win7 lab box.
This cloned QSPI flash was programmed using the standard XMOS startKit. Will document the process in detail as soon as free time permits.
Summary is:
a) use a SMD hot air gun to remove the factory supplied low density FLASH device off the XMOS startKit. Many low cost tools are posted on Aliexpress / Ebay, etc. Ours is a Weller station.
b) solder in a fresh IS25LQ016B device into the same footprint on the startKit.
c) use a custom SPI SPEC file to define the properties of this IS25LQ016B device with XFLASH (although XFLASH is apparently able to support the same device - at this time, unable to use the XFLASH definition) and apply the raw image read off the XRHA official XMOS supplied board.
This process is tedious and takes about 8 minutes to write the full image (byte for byte).
Standard SPI commands were used for this exercise. NB: The startKit FLASH footprint does not allow for QSPI mode R/W !! This is important to note and may risk damage to the flash if enabled and access is made in QSPI mode.
d) After the above full write, enable the QSPI mode (non-volatile status register).
e) Verify the QSPI mode is enabled.
f) use hot air tools to remove the cloned QSPI flash device and apply onto your target board.
Dan - recommend for you to try again with a fresh view of the image as per my earlier post.
No issue to send you a cloned QSPI device as well. We are in Canada so not sure how urgent your request is but we do have a discounted shipping rate with Fedex (2 business day delivery) @ $ 15 USD. Otherwise have Canada Post (should be about $10 USD or less (guessing) with 7-10 working days to your location).
Moving forward and to pay some bills, we will soon offer production / commercial grade programming adapters using the XMOS processor with zero force socket(s) at affordable pricing.
The focus is to be able to reduce the cloning time of the QSPI flash by using QSPI mode for R/W (ie. read in QSPI mode off the original -> write in QSPI mode to the target).
-
- Experienced Member
- Posts: 75
- Joined: Fri Apr 15, 2016 6:46 pm
Well, I'm seeing some progress.
I programmed the flash with usb_xhra_2_1_1_0.bin directly (no nibble swapping) and am now seeing activity on the USB bus, and the host PC is responding, but says the USB device is not recognized. The XMOS driver IS installed on the host. While not resolved, this is at least a step in the right direction.
I am finding it difficult to capture the signals on the USB bus with my scope but will keep trying.
Thanks!
Dan
-
- XCore Legend
- Posts: 1913
- Joined: Thu Jun 10, 2010 11:43 am
What does the Device Manager show ? Perhaps you are only missing the required signed drivers ?
Share the screen capture of the Device manager.
Are you on a 64 bit OS ?
==============
With the absence of a paired driver, the USB text from this widget should be:
"xCORE-AUDIO Hi-Res 2" and then remain yellow marked in your Device Manager.
Do you see such a device ? If not, perhaps you can reflash your QSPI flash with the image we have extracted ?
What we have not done yet is to take your image, swap the nibbles and test on the same target XRHA PCB. Trying to limit the number of iterations to prevent any SMD pads from being lifted from the rework.
-
- Experienced Member
- Posts: 75
- Joined: Fri Apr 15, 2016 6:46 pm
Update:
After assembling the new version of my test board the device is finally fully recognized by Windows! The driver successfully installed upon plugging, and it appears in Device Manager, as well as the XMOS Control Panel. The XMOS Control Panel reports the current sample rate at 48KHz.
I have selected the board as the default sound playback device and attempted to play a test tone (at the 48KHz sample rate) through it, but get an error message stating playback failed. Granted, I do not currently have a DAC connected to the I2S output of the XHRA, but I was hoping to at least see the stream LED illuminate indicating data throughput. Apart from writing configuration information into the flash, can I not control/configure the device for different sample rates and bit depths within the host? Any idea why I get the failure. I looked for documentation related to this on the XMOS Hi-Res page but found none. Sadly, this did not surprise me.
Thanks!
Dan
-
- Experienced Member
- Posts: 75
- Joined: Fri Apr 15, 2016 6:46 pm
Well, apparently you MUST have at least MCLK (I believe) connected to the bridge in order to have signal throughput and avoid the Windows error I was seeing. With the I2S signals connected tomy DAC board I was able to play audio...finally!
MON2 for the win!
Thanks for all your help!!!
Painful, but gratifying learning process!
MON2 for the win!
Thanks for all your help!!!
Painful, but gratifying learning process!